Wood Shop
/https://siu.edu/search-results.php
Last Updated: Nov 07, 2025, 01:37 PM
The wood shop is your all-things-wooden project headquarters. Want to make a new book shelf for your dorm room? Build a spice rack for your parents? All you have to do is sign up for a one-week, month, semester, or year-long pass to the wood shop, take a small proficiency test, sign the waiver, and start creating! Our staff can help you with your project as you go or you can browse through our huge selection of project magazines. We carry on-hand a huge selection of medium and hard woods and even some exotic woods.
Wood Shop Fees
| SIU Students | Community |
|---|---|
| $5 for 2 day pass | $10 for 2 day pass |
| $15 for 2 weeks pass | $25 for 2 weeks pass |
| $25 for a semester pass | $35 for a semester pass |
Wood Shop Features
- Table saw and scroll saw
- Belt sanders and many handheld sanders
- Just about any hand tool you would need
Radial Arm Saw
The radial arm saw is best at cross cutting wood.
When cutting on the radial arm saw always push and hold your wood flat against the fence while cutting. The saw blade is pulled with a stiff arm slowly across the wood then returned to the back of the saw after the cut. Do not reach across the line of cut while the blade is spinning to pick up your wood.
We do not use the radial arm saw to rip board in the Student Center.
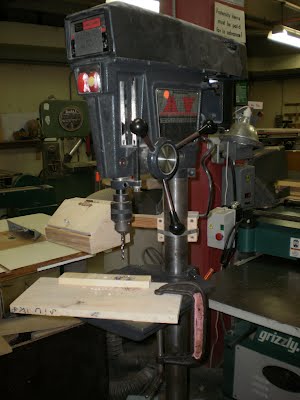
Drill Press
The drill press is used to drill holes in a variety of sizes and materials from wood, plastic and all sorts of metals. There is a speed chart on the side of the drill which explains the best speed for the size of hole and the material to be drilled. Spade bits and Forstern type bits should always be used at the lowest speeds.The Chuck key is used to change drill bits.
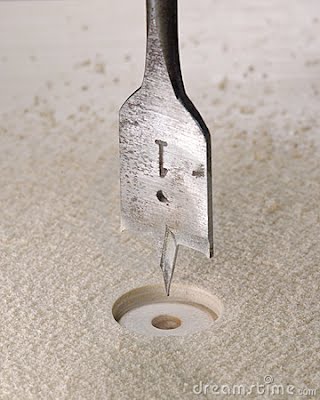
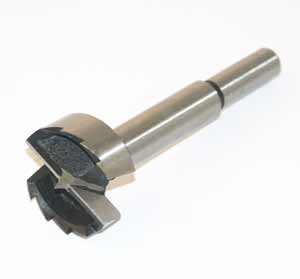
Bits
Forstner Bit & spade bits for larger holes should always be run at lower speeds.
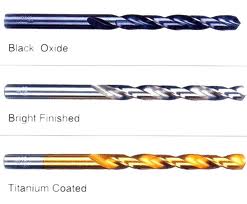
Twist bits work at a variety of speeds.
Jointer
The jointer replaces the hand plane with a powerful rotating cutter that squares the edge of a board making gluing of several board side by side easy. Here are your safety tips:
1. Do not join wood shorter than 12″
2. Do not join end grain. see video
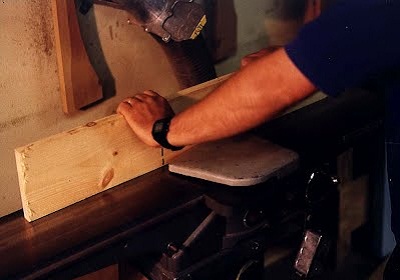
3. When joining boards taller than the fence lock your fingers over the top edge.
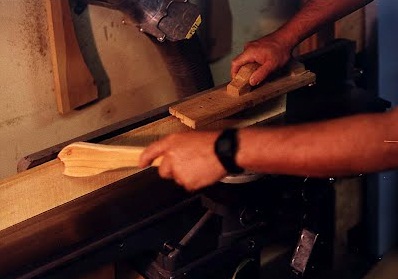
4. When joining wood that is shorter than the fence use push blocks.
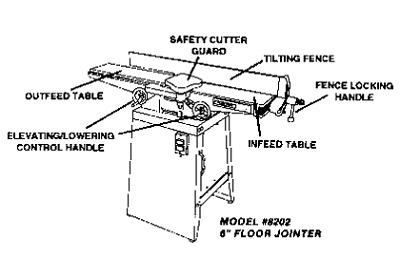
This diagram illustrates the basic parts of the jointer (machines may vary.)
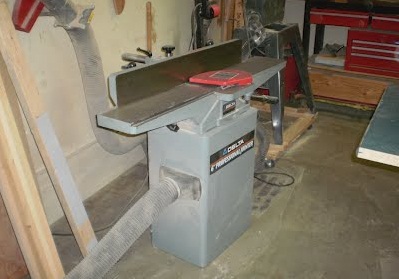
This is our jointer.
Please note that the fingers are overlapping the top of the board on wood that is taller than the fence.
Wood that is shorter than the fence should be pushed through with a push block and a push stick.
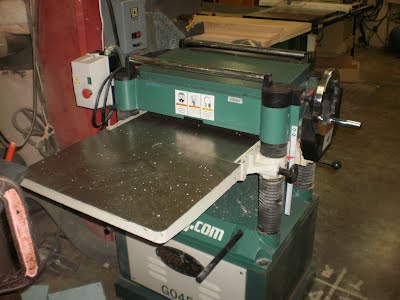
Wood Planer
General rules of the wood planer:
1. Do not plane wood with nails, wires, sand, concrete, or other materials that will dull or chip the blades
2. Do not plane wood shorter than 12″ long
3. Always plane the wood with the grain. No end grain.
4. Make sure that the dust collector is turned on and open to the planer before the starting the planer
5. Only take off a 1/16 of an inch or less with each pass of the planer
Wood Lathe
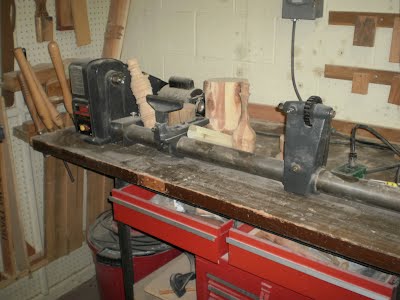
This is a 12″ Sears Wood Lathe (6″ swing). It is great for the beginner. Its lack of strength means less accidents. The lathe can turn both bowls and spindles (base ball bats). There are a variety of tool rests and tools that go with this machine.
Router
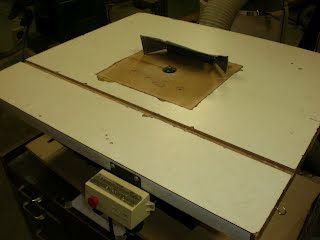
The router puts decorative edges on wood. The most common edge is just rounded. The router is usually attached to the router table when working on small objects like paddles, frame molding, plaques, and cutting boards. This tool operates at high speed, so care must be taken for safety. 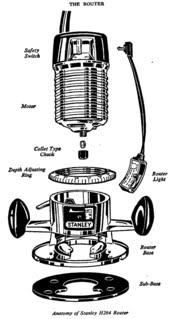
- Always feed the wood into the blade in the opposite direction that it is spinning
- Never put your hands on the same edge that is being routed
- Always get the router up to full speed before feeding wood into the blade
- Make sure the dust collector is turned on
- To change a router bit, unplug the router, loosen the motor housing and pull it out. Then use two wrenches to loosen the collet. Slide the bit out and replace it with a new one. Do not push the router bit to the bottom of the collet.
Router Table
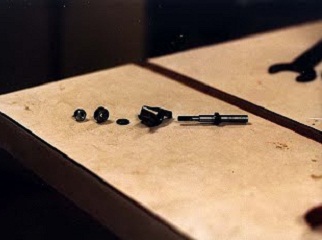
Assembling a router bit
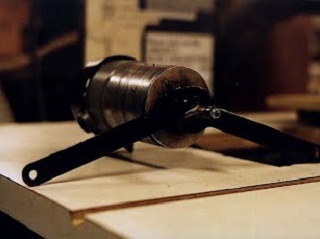
Tightening a router bit
Band Saws
Working with a band saw is a lot like sewing. The operator follows a line drawn on the wood by simply turning the wood as it is cut. However, the sharpness of the curve depends on the size of blade installed on the band saw.
General Band Saw Rules:
- The upper guard should be adjusted as close as possible to the wood you are cutting with out touching it. This helps protects your hands from touching the blade.
- Relief cut should be made in wood when the curve to be cut is too sharp for the blade or when the blade binds up and slows down.
- The wood should be feed into the blade at a rate that does not slow the saw down.
- Round or irregular shaped objects should be clamped to a miter gauge, a V – block or other stabilizing device to prevent them from rolling or wobbling while being cut.
- Because band saw blades are flexible they eventually break. If a blade breaks, turn off the machine and and ask for assistance.
- The straight fences like on a table saw will not work; the blade is flexible and the operator must turn the wood in order to follow a straight line marked on the wood.
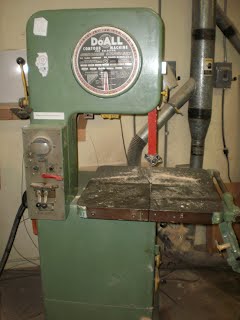 DoAll with a 3/4″ blade for large graceful curve. This saw has a blade welder for fixing blades.
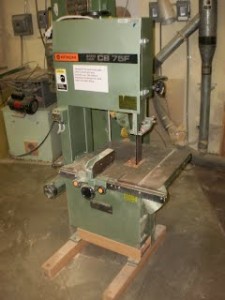 This Hitachi has a 3″ blade for book match or re-sawing wood. This saw does not cut curves. Do not attempt to cut logs with this saw. Wood must be stabilized when using this saw.
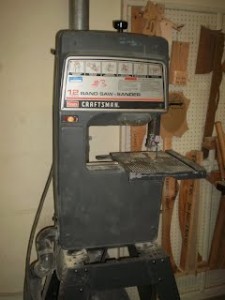 We have three 12″ Sears band saws.With the 1/4″ blade they are great for making tight curves.
Rules of the Wood Shop
- No treated wood allowed.
- Patrons must sign in and out on each visit.
- Patrons must be current in their user fees before using the Shop.
- All Patrons must take a proficiency test, or be enrolled in a Student Center Craft Shop Wood Shop workshop or program to use the equipment.
- All patrons must sign a liability waiver before using the shop.
- Patrons are responsible for cleaning up messes.
- Patrons are responsible for hauling and storing of their own materials (wood, glue, hardware, etc.) Patrons must re-register for wood shop membership by the end of the second week of each semester to retain their storage space or locker. All spaces materials should be labeled with the patrons name and email address.
- Treated Lumber is not allowed in the shop.
- Fiberglass is not allowed in the shop.
- Individuals that damage tools either by forcing the tools beyond their manufactured limits and/or Student Center Craft Shop regulation will be charged for the repair or replacement of the value of the damage and could lose wood shop privileges.
- Shoplifters will be prosecuted.
- Individuals should obey all other safety regulations for equipment posted or otherwise.
- The Student Center Craft Shop is not responsible for accidents, or items stored in the shop.
- Persons who endanger others or themselves will be banned from the shop.
- Do not wait until the last minute to start a project that is due tomorrow. Wood Shop hours are closely observed.
Violations of shop rules can result in lost privileges.